
|
|
#1
 04-14-2014, 11:56 AM
|
||||
|
||||
|
So I literally plopped my new-to-me Furutra's down where most of the speakers work in my room - an equilateral triangle 12' on a side with the speakers about 3' from the back wall and 2' from partial side walls that are actually even with the speakers. Sounds pretty good, and I'll be dialing it in this week.
I'd like other owner's advice on how they set up their speakers for best imaging and soundstage presentation. Thanks! Tom 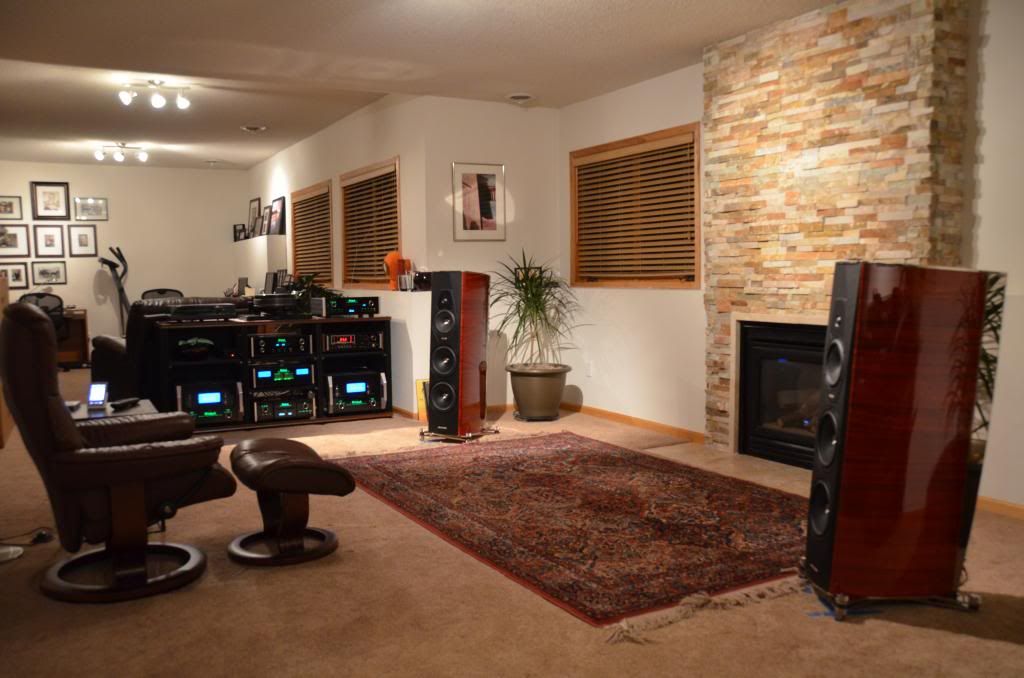
__________________
Main System: Amati Futura Mains Amati Homage VOX Center, Proac Response 1sc Rears, Three MC2301's for L,C,R MC 602 for the rears C 1100, MX 151, MCD 1100, MR 80 Nottingham Dais with Wave Mechanic Sumiko Palo Santos Presentation SurfacePro 3, RPi 4, ROON, WW Starlight Platinum USB, Schiit Yggdrasil, Benchmark DAC3 HGC MX 151, OppO BDP-95, JVC RS-500 DILA projector, 106" diagonal Stewart Luxus Screenwall Deluxe with Studiotek 130 G3 material. Lake House: Ohm F, MC 275V, C2300, MR 77, Rega P3 OnDeck: McIntosh MAC 4300v 
|
|
#2
04-14-2014, 01:25 PM
|
||||
|
||||
|
My experience is that every room and every speaker differs from each other in how to place them in a room. Try different places and listen. Some times very small changes really can make it perfect. Your picture indicate that this is a good start.
__________________
It Don't Mean a Thing If It Ain't Got That Swing
|
|
#3
04-14-2014, 02:33 PM
|
|||
|
|||
|
Stunning, Tom - absolutely stunning. Good luck getting them dialed in, I'm sure you'll enjoy

|
|
#4
04-14-2014, 06:21 PM
|
||||
|
||||
|
My method was to get the position for the best bass, first. Once that was achieved, I would toe for image. Bass is critical for loading the room, then image, next. I used some acoustic bass tracks for this, and then female vocals for the image.
Plus, I also had a Sumiko rep come to the house to tweak them, after I had tried. I was very close, but the reps final tweak, nailed it. Good luck.
__________________
Florida Dan D'Agostino Momentum HD Preamp Dan D'Agostino Momentum Phono Preamp Dan D'Agostino Momentum M400 MxV x 3 Dan D'Agostino Momentum S250 dCS Vivaldi Apex DAC dCS Vivaldi Upsampler dCS Vivaldi Clock Wilson Audio Alexia 2, Yvette & Mezzo REL No.32 x 2 REL Carbon Special x 2 AVID Acutus Ref SP, Roon Nucleus+ McIntosh MX151, MVP881 HRS SXR Signature Audio Stand Transparent Gen5Ref throughout! New York Dan D'Agostino Momentum HD Preamp Dan D'Agostino Momentum M400 MxV x 2 dCS Rossini Dac dCS Rossini Clock Wilson Audio Alexia 2 REL No.25 x 2 Roon Nucleus+ Transparent Gen5Ref throughout!
|
|
#6
04-14-2014, 08:11 PM
|
||||
|
||||
|
Tom...they look fantastic and I love the arrangement you have there.
I use a Sumiko "Master Set" for my speakers. I do the equilateral triangle first, then follow the process shown below. Good luck!!! The Principle: Master Set is based on the idea of matching sound pressure between the speakers creating a single sound source. The idea is to “fix” one speaker on one side of the listening room, and then to match the other speaker’s sound pressure to the “fixed” speaker. The goal is to have each speaker pressurize it’s own half of the room, with no center overlap of sound, cancelling and competing and fuzzing the center image. The Result A perfect left-right stereo music image with undistorted sound from each instrument and voice. While this may be the goal of every setup ever devised, Master Set achieves this with great success. The Needed Tools: The only items needed to perform Master Set are your ears, a setup recording, and a small level. Master Set can be performed by one or two persons. It’s much easier with two people, but that is not a limiting factor at all. Master Set is judged only by your own ears, there is no other measuring of any kind. The speakers need to be moved, often in very small increments. Spikes will need to be removed, or have something under them to allow easy movement. Furniture sliders under the spikes work very well. _Edit_ I didn't remove the spikes. I agree it would have been easier but once I had them set, I didn't want to mess with the placement any further. <M> The Set Up Recording: Ballad of a Runaway Horse by Jennifer Warnes and Rob Wasserman. You can find this song on the cd Duets, by Rob Wasserman. This song works because of its simplicity and the steadiness of the voice line and the bass line. The voice is perfectly centered and solo. The bass is slow, steady, and easy to hear. Since this is the only real cost involved, the cost is minimal. _Edit_ You can use a different song if you like. What you are looking for here is a track you are familiar with, a reference track so to speak, that you can use for setting the image and detail. I do like that song, however. <M> Step 1: The beginning set up Master Set is most successful when the speakers are set against the long wall in the room. However, if the short wall is long enough to allow enough space between the speakers and not be too close to the sidewall, then this can be used. Speakers are set against the rear wall perpendicular to it. Speakers and listener are at points of an equilateral triangle. Spacing is approximate and dependant on room size. Listening position should be at least 2 feet out from a wall behind the listener, and speakers should be as far away from side walls as practical. Listen to the recording and adjust speakers as needed to get a good solid center image of the singer. Adjust by moving speakers together or apart in small increments and listening to changes. This should only take a few minutes unless you have an irregular room, as I do, in which case this can take longer. Step 2: Setting the first speaker This step will set one speaker into position and is based on finding the smoothest bass response. Either speaker can be used. With the volume at a decent level, move the speaker out from wall about 6 inches, toeing in directly to listening position. Sound should still be perfectly centered. Continue to move speaker out at 1 inch increments until sound begins to move toward the speaker being moved. Move speaker in progressively smaller increments until sound is totally from the moved speaker. Mark this spot. Now, search for the best bass by trying to find the bass nodes. Move speaker out in roughly 1/8th inchincrements listening to the bass notes. I find it easiest to use a tape measure here so that the movements are not too much. Slight accentuation of one of the bass notes is a bass node. Rod tells me there are 5 or 6 nodes. You are searching for a setting where the bass notes are somewhat even and don’t go “plonk” or something like that. I find it easiest to hear things in the first 2 verses of the song, and I tend to repeat them over and over as I go. It may help a lot if you turn the speaker against the wall out 45 degrees towards the sidewall, but still have it playing. Move the speaker in very small increments and mark settings. Continue to move speaker back and forth until you are comfortable with the sound. Take a long time with this! Once this speaker is set in place it is fixed and there is no more adjustment to it. Time can fly right by - an hour is about right for first time. If you have a hard time hearing differences, as has often happened to me, well, take a break. And I also find that if differences are hard to find, just guess at what you think is best and go from there. Set the speaker in place with spikes installed, or whatever is needed for permanent placement. Level the speaker. This speaker will not be moved again. NOTE: Do not be tempted to turn off the other speaker while doing this. You need both speakers playing in order to properly find the setting where the sound all goes to the moved speaker as this is the point where the sound decouples from the rear wall and the other speaker and is the beginning point for finding the bass setting. Keep the speaker as level as possible while doing all the moving, etc, and keep the speaker toed in directly at the listener. Step 3: Setting the other speaker. This step will move the other speaker into place and be adjusted to match the sound pressure of the already placed speaker. Move the speaker out from the wall to approach the approximate distance as the fixed speaker is out from the wall, toeing speaker directly in to listening position, and keeping speaker level. Mark this spot. Move speaker in slight increments in or out from this setting listening for a centered voice. The sound pressure of the two speakers is equal when the voice is perfectly centered with a tight sound. Listen for slight variations in the voice weighted to one side or the other or a slight pulling apart of the voice. Move in very small increments as often as necessary until you are sure that you have a perfectly centered voice and tight sound. You cannot take too long to do this, and hour can pass by quickly! Take as much time as you need to feel like you have found it! From a seated centered listening position, the voice centers up quite easily. However, you may not have balanced sound. Try sitting directly on axis with each speaker. When the sound stays stable and centered at all three positions, then you have really close to balanced and equal sound pressure from each speaker into the room. You can tweak the midrange setting at this point by varying the toe in from direct at listener to being able to see the inside of the speaker cabinet. That’s only about ½ inch of movement, so very small incremental movements are needed. My own experience has been that I have been unable to hear any differences while doing this. When you are comfortable with the sound, set the speaker permanently in place and level the speaker. Step 4: Finalizing and Listening Play some familiar recordings and listen carefully to the left-right stereo image balance. Listen to make sure each side is equal in sound. If one side is slightly louder, move the speaker from Step 3 as follows: in to wall if this side is louder, out from wall if this side is lower in sound. Move in very small increments. Keep at it until everything is just THERE. It's a bit like fine focus on an camera lens. Listen to music for a few days, or a week, and get familar with the sound. Redo this step as needed until everything is just perfect. You'll know it!
__________________
Michael 4K QLED|Aerial Acoustics|McIntosh D100 - MC501 - MX151|Bluesound|Schiit|Wyrd4Sound
|
|
#7
04-14-2014, 10:05 PM
|
||||
|
||||
|
Thanks everyone. I have the room coupling dialed in and am working the imaging and rake angle. It will take me awhile. These require a different setup than my previous speakers. Lots to do.
Michael, Thank you, this was the information I needed. I will get a copy of "Runaway Horse". I have it on 45 RPM vinyl, on the Jennifer Warnes 20th Anniversary box of Famous Blue Raincoat. I love that track, so it will be with mixed emotions that I turn it into a test track.  Thanks again, Tom
__________________
Main System: Amati Futura Mains Amati Homage VOX Center, Proac Response 1sc Rears, Three MC2301's for L,C,R MC 602 for the rears C 1100, MX 151, MCD 1100, MR 80 Nottingham Dais with Wave Mechanic Sumiko Palo Santos Presentation SurfacePro 3, RPi 4, ROON, WW Starlight Platinum USB, Schiit Yggdrasil, Benchmark DAC3 HGC MX 151, OppO BDP-95, JVC RS-500 DILA projector, 106" diagonal Stewart Luxus Screenwall Deluxe with Studiotek 130 G3 material. Lake House: Ohm F, MC 275V, C2300, MR 77, Rega P3 OnDeck: McIntosh MAC 4300v
|
|
#9
04-14-2014, 10:23 PM
|
||||
|
||||
|
Tom.......I used the Masters Series setup system to dial in my Amati Anniversario speaker with great success. Initially I had located the Anniversario's in the exact same spot where my Guarneri Memento's worked best and thought the sounded very good. I left them like that for about a month, then performed the official setup. Following the steps to couple the bass output to the room, my low frequency range became coupled to the room in a way that delivered a much deeper and stronger bass response. Once that was complete I worked on getting the sound stage accurately developed. What I discovered after much trial and error, my best sound stage dimensions for width and depth came with crossing the tweeter axis in front of my head by about six inches. Originally I had the tweeter axis crossing about six inches behind my head and it was quite satisfying, but when I adjusted the speaker toe-in so that the tweeter axis crossed in front of my head the sound stage literally snapped into focus. I haven't touched the speaker locations since and find the presentation to be perfect.
__________________
Dan  STUDIO - McIntosh C1000C/P, MC2301 (2), MR88, Aurender N10, Esoteric K-01X, Shunyata Sigma spdif digital cable, Sonos Connect, PurePower 2000, Stillpoints, Furutech Flux 50, Michell Gyro SE, Michell HR Power Supply, SME 309, Ortofon Cadenza Black, Wireworld, Sonus faber Amati Anniversario LIVING ROOM - McIntosh C2300, MC75 (2), MR85, Magnum Dynalab 205, Simaudio MOON Neo 260D-T, Schiit Audio Yggdrasil, Aurender N100H, Shunyata Sigma USB cable, Micro Seiki DD40, Ortofon Cadenza Blue, Nakamichi BX-300, Sony 60ES DAT, PS Audio P10, Furutech Flux 50, Sonos Connect, Stillpoints, Wireworld, Kimber, PMC EB1i, JL Audio f113 VINTAGE - McIntosh MA230, Tandberg 3011A tuner, Olive 04HD, Sony DTC-59ES DAT, McIntosh 4300V, JBL 4312A Last edited by jdandy; 01-25-2016 at 06:07 PM.
|
|
#10
04-14-2014, 10:55 PM
|
||||
|
||||
|
Quote:
Should get you pretty close. Just remember that in speaker set up an inch is as close as a mile. Last edited by metaphacts; 04-14-2014 at 10:57 PM.
|
 |
|
|

| Audio Aficionado Sponsors | |
|
AudioAficionado Subscriber
 Inspire By Dennis Had
 Harmonic Resolution Systems
 Wyred4Sound
 Dragonfire Acoustics
 GIK Acoustics
 Esoteric
 AC Infinity
 JL Audio
 Add Powr
 |
Accuphase - Soulution
 Audio by E
 Canton
 Bryston
 WireWorld Cables
 Stillpoints
 Bricasti Design
 Furutech
 Shunyata Research
 Legend Audio & Video
 |


 Linear Mode

